Showing posts with label halloween. Show all posts

10.26.2011

{free printable} Please Take One Halloween Candy Sign

Every year I feel bad that I leave our house (and candy) unattended while we take our kidlets out and about the neighborhood, but this year I'm setting this sign out with the candy and having a guilt free night.
If you would like to download your own copy go HERE. Hope your little ghosts and goblins have a great night of trick or treating.  Happy Halloween!

10.13.2011

{tutorial & free printable} Halloween Burlap Wreath

These burlap wreaths are popping up all over the internet, but I specifically found inspiration at Craftaholics Anonymous to make mine.
I've seen most burlap wreaths made with wire hangers bent into a circle, but I chose to use a wreath form.  However, the green would definitely poke through so I needed to paint mine black first.
I used basic craft paint, but I suppose if you had black spray paint laying around that would work too.
While the paint is drying, lay out your burlap and cut 1x18 inch strips of fabric.  I chose to make mine a bit longer than other tutorials because the wreath form is thicker than a wire so it requires more fabric to wrap around.
I cut strips from approximately 3/4th of a yard of fabric and that seemed plenty for my wreath, but if you like a more fuller look I would purchase at least a yard of burlap to be safe.

 Just as I was about to begin wrapping my wreath with fabric I looked down to see black paint splatters all over my shirt.  What can I say I'm a messy crafter, but if anyone has any tips as how I could remove paint splatters from a shirt please send them my way.  Back to the wreath-- just tie knots of fabric around your wreath until your satisfied with the fullness.  Make sure NOT to pull too tight on the burlap when knotting-- it's very sensitive and will break with just a little amount of strength.  I then attached this little crow I found at the dollar store with some super glue and wire.  Now your wreath is ready to hang.  I paired mine with this little "trick or treat" sign I had laying around, but you could hang your wreath with my printable file below.  All you would need to do is mod podge it onto some wood or tin and string with some burlap or ribbon.

To download your own "Trick or Treat" sign go HERE
Total Cost of the Project: $8
Wreath Form (Joanne's Fabric with 50% off coupon): $4
1 Yard of Black Burlap Fabric (Joanne's Fabric with 40% off coupon): $3
Black Crow (Dollar Store): $1

10.10.2011

{free printables} Trick or Treat Halloween Party

I've got everything you need to throw one spooktacular Halloween party!  This printable includes:  5" Happy Halloween Circular Image, "Eat, Drink & Be Scary" Print, an assortment of Spooky Apothecary Jar Labels, "Trick or Treat" Banner, Food Labels, Fill-in Invites, and 2" Cupcake Toppers/Party Circles.


I wish I was a girl of more clever words, but lets be honest I'm tired today and the kids are about to wake up from their nap.  So it is what it is.  Enjoy!  :)
To download the FREE printables go HERE
To download the FREE invitations go HERE

11.01.2010

Halloween Cupcakes

This is what my kitchen looked like for two days straight. I'm sure my hubby loved that. I tell you what he did love though-- the fruits of my labor-- cupcakes.
It was my first real time working with fondant and it was surprisingly easy. I bought the pre-made Wilton rolled fondant in white from Michaels and used all of my own stuff to color and cut them. The secret is to have plenty of crisco and confectioners sugar at hand. If your fondant becomes too dry grease your hands up with shortening and it will become soft again. If it becomes too sticky-- add more sugar and you will be able to roll it out smoothly.
My newest favorite items are coloring powder. You add a little to water or some other liquid agent and then you can paint onto the fondant (like watercolors).


I think my next venture into the fondant world is to make an actual cake. But for now, I think the cupcakes turned out darling.

10.26.2010

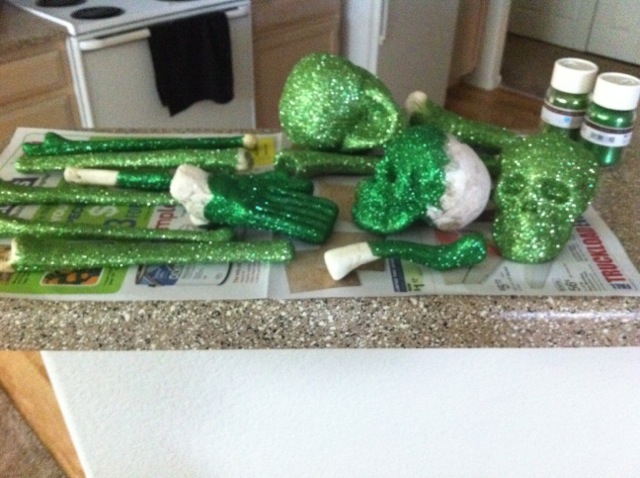
Glitter Skulls

I hate glitter. Let me rephrase that-- I HATE GLITTER! So usually you would not find me anywhere near it in the craft store let alone in my own home. However, Martha Stewart inspired me and helped me get past my absolute hatred for this versatile craft supply.

Michaels again supplied all needs for this craft project. My mother-in-law helped me with these while she was in town and if it wasn't for her gentle prodding I'm not sure I would have actually gotten them done. All we did was paint Mod Podge glue onto the skulls and cover in two shades of green glitter.

They're no Martha Stewart quality, but I'm glad I branched out and did it. Who knows, maybe this has turned a new page in my book towards glitter. Maybe. Just maybe.

LinkWithin

Related Posts Plugin for WordPress, Blogger...