3.22.2011

{free printables} Easter Party


I know you've heard enough about these darn Easter printables, but I thought I would make them available through my own means rather than counting on the sites that featured me to do all of the work.

DOWNLOAD THEM HERE.

3.12.2011

{free printable} St. Patrick's Day Cupcake Wrappers

With St. Patrick's Day quickly approaching I've decided to make some cupcake wrappers FREE for downloading. Happy cupcake making and wrapping.

download FREE printables here.

If you like the look of these the whole party printables collection can be purchased on my etsy site.

11.01.2010

Halloween Cupcakes

This is what my kitchen looked like for two days straight. I'm sure my hubby loved that. I tell you what he did love though-- the fruits of my labor-- cupcakes.
It was my first real time working with fondant and it was surprisingly easy. I bought the pre-made Wilton rolled fondant in white from Michaels and used all of my own stuff to color and cut them. The secret is to have plenty of crisco and confectioners sugar at hand. If your fondant becomes too dry grease your hands up with shortening and it will become soft again. If it becomes too sticky-- add more sugar and you will be able to roll it out smoothly.
My newest favorite items are coloring powder. You add a little to water or some other liquid agent and then you can paint onto the fondant (like watercolors).


I think my next venture into the fondant world is to make an actual cake. But for now, I think the cupcakes turned out darling.

10.26.2010

Craft Heaven

It's more of a craft nook than anything, but it's nice to finally have a space and organization for all of my "crapts" (as Tim would so nicely put it). I still need to figure out where I'm going to put my sewing machine and cricut cutter, but besides that I'm pretty much in craft heaven.
Since most of my creations occur during Miles' nap time, Graham is typically my craft buddy. And what a cute craft buddy he is. Wouldn't want it any other way.

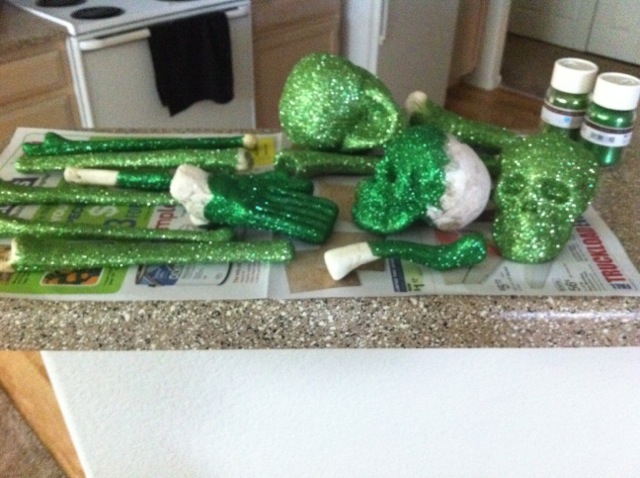
Glitter Skulls

I hate glitter. Let me rephrase that-- I HATE GLITTER! So usually you would not find me anywhere near it in the craft store let alone in my own home. However, Martha Stewart inspired me and helped me get past my absolute hatred for this versatile craft supply.

Michaels again supplied all needs for this craft project. My mother-in-law helped me with these while she was in town and if it wasn't for her gentle prodding I'm not sure I would have actually gotten them done. All we did was paint Mod Podge glue onto the skulls and cover in two shades of green glitter.

They're no Martha Stewart quality, but I'm glad I branched out and did it. Who knows, maybe this has turned a new page in my book towards glitter. Maybe. Just maybe.

Skeleton Leaf Pictures

I saw some beautiful skeleton leaf prints back in Utah and I wish I had bought them while I was there, but being impatient I decided to try my hand at my own art. Now, you can actually make skeleton leaves yourself and the process is rather easy. I'll post that below at the end, but these are actually from my local Michaels craft store and for $3.59, plus the frames (which were 40% off), I did this entire project for less than 35 buckarooskies.

Seriously the easiest thing I've ever done. All I did was cut the paper to the right size of the frame, place the leaves in the order I wanted them and dabbed them with a sponge brush of mod podge. SO EASY.

They turned out better than expected! Boy do I love Mod Podge.

How to make your own skeleton leaves:

There are actually a few ways to make skeleton leaves, but I think this is probably the easiest and doesn't force you to go out and buy anything weird in order to make them. All you need is water and bleach. You want to pick waxy type leaves that are a bit more sturdy. I've heard that maple leaves turn out the best and are the easiest for beginning skeleton leaf makers. :) First you'll want to clean off the leaf and then soak it in a really strong bleaching solution until it turns white. Remove the leaf from the bleach and rinse it--- being very careful to not break it. If needed, you can remove any excess pulp from the leaf by using a stiff-bristled paint brush. At this point your leaf will be colorless, but you can dip the leaf into food coloring or other coloring agents to get whatever color you desire. Then lastly, you must let the leaf dry completely before using it in whatever craft project you desire. Happy skeleton leaf making!

Candlesticks

I was having a hard time finding a pair of candlesticks that I really liked the color and shape of so I decided to make do with what I could find. These candlesticks were $5 each at TJ Maxx and the spray paint was a few bucks at Lowes.
I always forget how much overspray comes from spray paint cans. I really should have done it on the lawn rather than our porch. It left a good mark there for future tenants.
I loved how they turned out. The pictures don't do it justice because quite frankly I'm too lazy to get out our nice camera to take pictures so these are from my phone.
Such a quick and easy fix. I'm sure I'll be using this technique again in the future, but only next time outside on the grass or rocks.

LinkWithin

Related Posts Plugin for WordPress, Blogger...